# 🤖 Discord-Style Gemini AI Chatbot Page **A pixel-perfect recreation of the modern Discord UI, powered by Google's Gemini AI.**
Key Features • Tech Stack • Getting Started • Configuration
Key Features • Tech Stack • Getting Started • Configuration
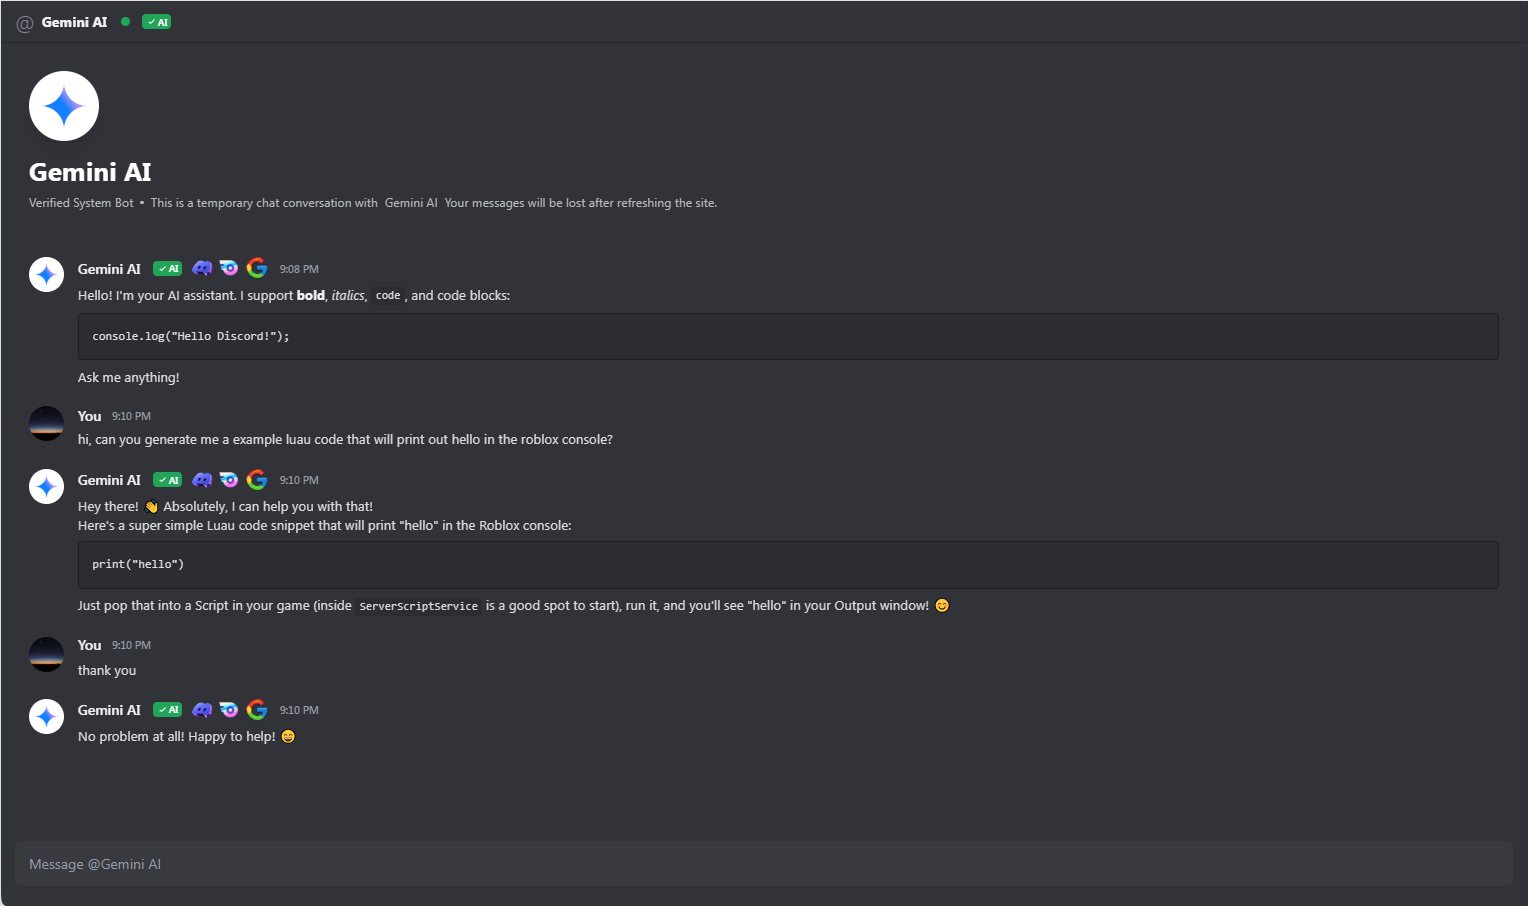 |
| 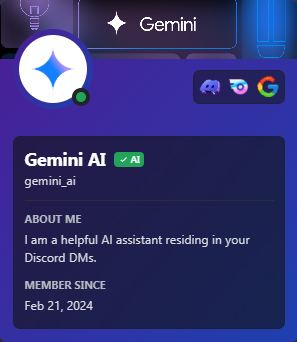 |
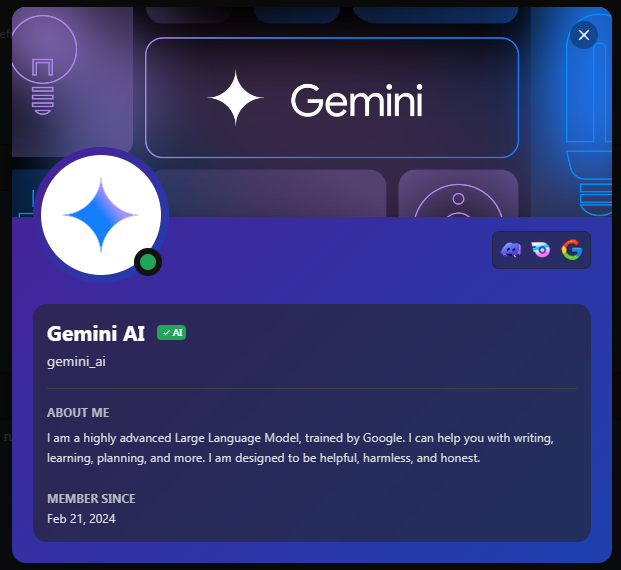
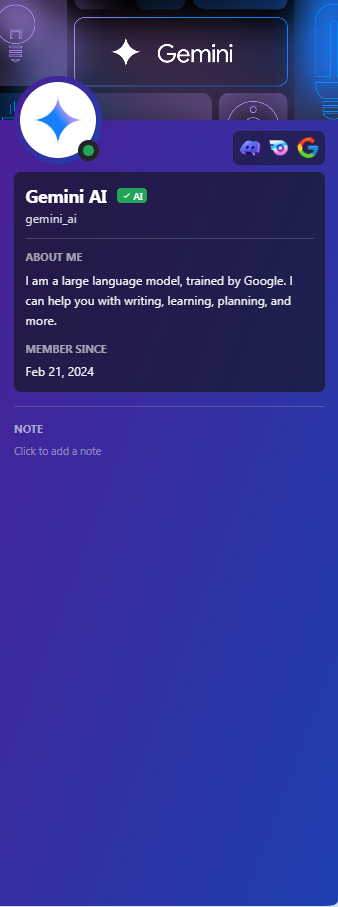
| **Full Profile Modal** | **Sidebar Preview** |
|:---:|:---:|
|
|
| **Full Profile Modal** | **Sidebar Preview** |
|:---:|:---:|
|  |
|  |
## 🛠️ Tech Stack
* **Frontend Framework:** React 19
* **Language:** TypeScript
* **Styling:** Tailwind CSS + Vanilla CSS (for custom scrollbars & animations)
* **Icons:** Lucide React
* **AI Integration:** @google/genai SDK
* **Markdown:** react-markdown
## 🚀 Getting Started
To get a local copy up and running, follow these simple steps.
### Prerequisites
* Node.js (v18 or higher)
* npm or yarn
### Installation
1. **Clone the repo**
```sh
git clone https://github.com/yourusername/discord-ai-chat.git
```
2. **Install NPM packages**
```sh
npm install
```
3. **Set up your API Key**
* Create a `.env` file in the root directory.
* Add your Google Gemini API key:
```env
API_KEY=your_google_gemini_api_key_here
```
*(Note: You can get an API key from [Google AI Studio](https://aistudio.google.com/))*
4. **Run the application**
```sh
npm run dev
```
## 🎨 Customization
You can easily customize the bot's personality or the UI assets:
* **Bot Persona:** Edit the `systemInstruction` in `services/geminiService.ts`.
* **Images/Assets:** Updated URLs in `components/ChatArea.tsx` and `components/UserProfileSidebar.tsx`.
* **Badges:** Add or remove badges in `components/Badges.tsx`.
## 🤝 Contributing
Contributions are what make the open source community such an amazing place to learn, inspire, and create. Any contributions you make are **greatly appreciated**.
1. Fork the Project
2. Create your Feature Branch (`git checkout -b feature/AmazingFeature`)
3. Commit your Changes (`git commit -m 'Add some AmazingFeature'`)
4. Push to the Branch (`git push origin feature/AmazingFeature`)
5. Open a Pull Request
## 📝 License
Distributed under the MIT License, however it may be a risk to use it since it mimics the real look of Discord. See `LICENSE` for more information.
---
|
## 🛠️ Tech Stack
* **Frontend Framework:** React 19
* **Language:** TypeScript
* **Styling:** Tailwind CSS + Vanilla CSS (for custom scrollbars & animations)
* **Icons:** Lucide React
* **AI Integration:** @google/genai SDK
* **Markdown:** react-markdown
## 🚀 Getting Started
To get a local copy up and running, follow these simple steps.
### Prerequisites
* Node.js (v18 or higher)
* npm or yarn
### Installation
1. **Clone the repo**
```sh
git clone https://github.com/yourusername/discord-ai-chat.git
```
2. **Install NPM packages**
```sh
npm install
```
3. **Set up your API Key**
* Create a `.env` file in the root directory.
* Add your Google Gemini API key:
```env
API_KEY=your_google_gemini_api_key_here
```
*(Note: You can get an API key from [Google AI Studio](https://aistudio.google.com/))*
4. **Run the application**
```sh
npm run dev
```
## 🎨 Customization
You can easily customize the bot's personality or the UI assets:
* **Bot Persona:** Edit the `systemInstruction` in `services/geminiService.ts`.
* **Images/Assets:** Updated URLs in `components/ChatArea.tsx` and `components/UserProfileSidebar.tsx`.
* **Badges:** Add or remove badges in `components/Badges.tsx`.
## 🤝 Contributing
Contributions are what make the open source community such an amazing place to learn, inspire, and create. Any contributions you make are **greatly appreciated**.
1. Fork the Project
2. Create your Feature Branch (`git checkout -b feature/AmazingFeature`)
3. Commit your Changes (`git commit -m 'Add some AmazingFeature'`)
4. Push to the Branch (`git push origin feature/AmazingFeature`)
5. Open a Pull Request
## 📝 License
Distributed under the MIT License, however it may be a risk to use it since it mimics the real look of Discord. See `LICENSE` for more information.
---
Made with ❤️ using React & Gemini